


How to Use a Cordless Drill for Furniture Assembly: 7 Beginner Tips
A cordless drill can make furniture assembly much faster, but too much speed or torque can damage screws and wood panels. These seven beginner tips will help you use a drill safely and finish furniture correctly.

27 July 2026
A cordless drill can make furniture assembly faster, but it should not replace careful hand tightening. Start with a low speed and low clutch setting, use the correct driver bit, keep the drill straight, and stop before the screw becomes fully tight. Finish important connections with a manual screwdriver. This approach works well for desks, shelves, bed frames, cabinets, chairs, and other flat-pack furniture. It also reduces the risk of stripping screw heads, cracking particleboard, or driving fasteners too deep.
1. Check Every Part Before You Start
It is tempting to open the box and begin drilling immediately, but a quick inventory can prevent problems later.
Lay out the panels, screws, brackets, dowels, and other hardware. Compare them with the instruction manual and separate similar fasteners into small groups.
Do not assume that two screws are interchangeable because they look almost identical. A slightly longer screw may pass through a thin panel or damage the finished surface.
This is also the right time to check each board for cracks, chipped corners, or incorrectly drilled holes.
2. Choose the Correct Driver Bit
The driver bit must fit the screw head closely. A bit that is too small may spin inside the screw and damage it. A bit that is too large may not sit fully inside the recess.
Most flat-pack furniture uses Phillips, hex, or occasionally Torx fasteners. Test the bit by placing it into the screw before attaching it to the drill. It should feel secure with very little movement.
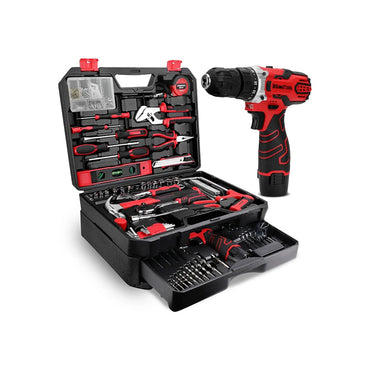
A household kit such as the KingTool 255 PCS Home Tool Kit with 12V Drill keeps common bits, hand tools, sockets, fasteners, and a cordless drill together in one organized case. It is intended for furniture assembly, shelf installation, everyday screwdriving, and light household repairs.
3. Start With a Low Clutch Setting
The numbered ring behind the drill chuck controls the clutch. A lower setting limits how much turning force the drill applies before the clutch slips.
Start low. Test the setting on one screw, then increase it gradually only when the drill stops before the screw reaches the correct depth.
Using maximum torque from the beginning is one of the easiest ways to strip a screw or damage particleboard. Furniture panels are often less forgiving than solid lumber.
The drill-symbol setting is normally intended for drilling holes rather than controlled screwdriving. Use the numbered clutch settings when installing furniture screws.
4. Use Low Speed for Better Control
High speed may look efficient, but it leaves less time to stop before something goes wrong.
Use the lower gear when driving screws. Press the trigger gently and increase speed only when the screw is moving smoothly. Slow down again as the screw approaches the surface.
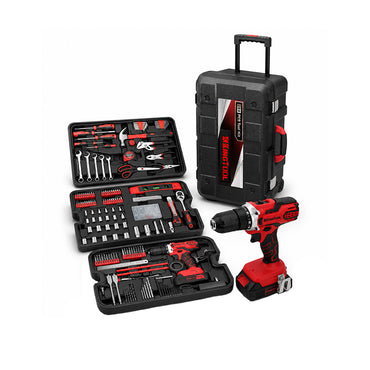
The KingTool 276 PCS Home Tool Kit with 12V Cordless Drill includes a two-speed drill with a 3/8-inch keyless chuck and a 1.5Ah lithium-ion battery. Its three-layer case organizes the drill, hand tools, sockets, bits, and accessories for regular household projects.
5. Keep the Drill Straight
Hold the drill in line with the screw. Tilting it places pressure on one side of the screw head and makes the bit more likely to slip.
Support the panel with your free hand, but keep your fingers away from the bit and the connection point. Apply steady forward pressure without forcing the drill.
When working at an awkward angle, stop and reposition the furniture instead of bending your wrist and trying to drive the screw sideways.

6. Do Not Fully Tighten Every Screw Immediately
Furniture often needs slight movement while the remaining panels and brackets are aligned.
Insert the screws and tighten them only enough to hold the structure together. Once all parts are correctly positioned, return to each connection and tighten it gradually.
For shelves, cabinets, and bed frames, alternate between different sides instead of fully tightening one corner first. This helps prevent misalignment.
Finish the final turns with a manual screwdriver when possible. It gives you more control and makes it easier to feel when the connection is secure.
7. Know When to Stop
Stop driving when the screw head sits level with the surface or reaches the position shown in the instructions.
More force does not always create a stronger connection. Overtightening can strip the internal threads, crush particleboard, crack plastic fittings, or pull metal hardware out of alignment.
Stop immediately when:
- The bit repeatedly slips out of the screw.
- The screw turns without becoming tighter.
- The wood begins to crack.
- The panel bends or separates.
- The fastener enters at an angle.
Remove the screw, inspect the hole, and correct the alignment before continuing.
Basic Cordless Drill Safety
Read the drill manual before use, inspect the bit and chuck, and keep loose clothing, hair, and jewelry away from moving parts.
The U.S. Consumer Product Safety Commission recommends following the manufacturer’s directions, wearing eye protection when debris may become airborne, and keeping hands away from moving components. The CPSC power-tool safety checklist provides additional household guidance.
OSHA also warns that hand and power tools can cause serious injuries when they are used or maintained improperly. Review the OSHA hand and power tool safety overview before beginning unfamiliar DIY work.
Frequently Asked Questions
Q: Can I assemble furniture with a 12V drill?
A: Yes. A 12V cordless drill is suitable for many furniture assembly and everyday screwdriving tasks. Use a low speed and clutch setting rather than maximum power.
Q: Should I use a drill or screwdriver?
A: Use the drill for repetitive screwdriving and a manual screwdriver for delicate fittings and final tightening.
Q: Why does my drill keep stripping screws?
A: The bit may be the wrong size, the drill may be tilted, or the speed and torque may be too high. Stop and correct the setup before the screw head becomes unusable.
Q: Can I drill new holes in flat-pack furniture?
A: Only when the instructions require it or you understand the material and hardware. Drilling in the wrong place can weaken the panel or damage the finished side.
Final Thoughts
A cordless drill makes furniture assembly easier when it is used for speed—not brute force.
Choose the correct bit, begin with low torque, keep the tool straight, and leave the final tightening for a manual screwdriver. These small habits can prevent damaged screws, cracked panels, and frustrating rework.
For furniture setup and everyday household tasks, explore the KingTool 255 PCS Home Tool Kit with 12V Drill or the KingTool 276 PCS Home Tool Kit with 12V Cordless Drill. More options are available in the KingTool tool kit collection.
Prev post

12V vs. 21V Cordless Drill Tool Kit: Which Is Better for Home Use?
Updated on 28 July 2026
Next post

How to Choose the Best Home Tool Kit for Everyday Repairs
Updated on 23 July 2026